
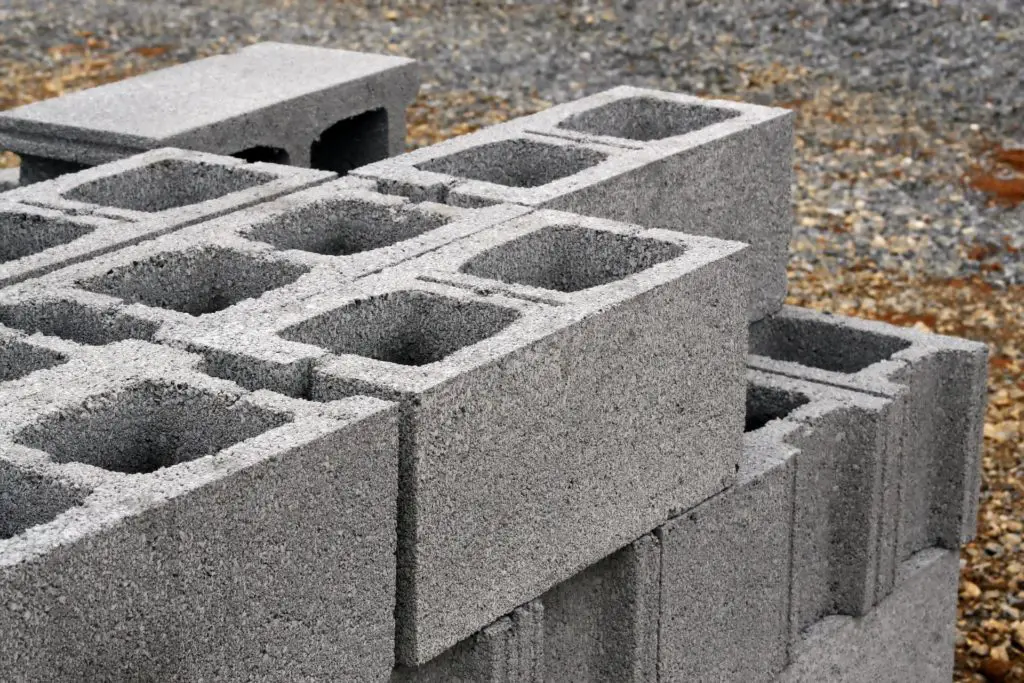
Cinder blocks is also known as concrete masonry units that are building blocks formed of concrete and different types of coal cinders.
Due to the fact, it contains less aggregate and other materials than other building blocks, a cinder block unit is particularly light.
In this article you’ll learn:
So, if you’re ready to go with the Cinder blocks, this article is for you.
Let’s dive right in.
What are Cinder Blocks?
Cinder blocks are also composed of concrete, but the composition includes either coal cinders or sand.
Blocks made of cinder weigh less than those made of concrete.
Open cells are used in the creation of concrete and cinder blocks so that additional concrete or metal reinforcement can be added for greater strength.
As compared to cinder blocks, concrete blocks are substantially more durable.
Some building codes specifically demand for the use of cinder blocks in building projects.
Contrarily, concrete blocks are often two-dimensional constructions made of steel, wood, or cement.
Purposes of Cinder Block Walls:
Cinder blocks are a practical and affordable building material in a range of shapes that are used for a variety of purposes:
- To employ as a security measure.
- To correctly fix the windows and doors.
- In order to keep CMU measurement.
- To improve the building’s appearance by decorating the wall.
How to Build a Cinder Blocks Wall in Steps:
1. Making the layout for the cinder wall:
You can indicate the cinder block wall’s layout with chalk or a piece of rope.
Calculate and determine the wall’s length.
By calculating the number of blocks needed to create the desired wall width, the width of the future wall can be established.
Utilizing the block’s measurements, the width is determined.
To begin the installation, place the cinder blocks as close together.
Avoid placing excessive weight in some regions that are not designed to support any temporary loads.
2. Calculating the Cinder Block:
You can determine the required amount of cinder blocks in square feet.
For instance:
8 × 16-inch cinder block measurements.
1.125 square feet are covered by one cinder block.
Total Cinder Blocks = 1.125 times the wall’s area.
The area of the wall is determined by deducting the area of the surrounding walls and any specified openings.
Height of Wall x Wall Length = Area of Wall.
To account for waste, add a 5% increase to the aforementioned area, So the wall’s area is 1.05. (Length x breadth)
Provide some extra material after the estimation is finished to take fillers into consideration and accommodate for any ambiguity in the plan.
3. Cinder block wall foundation wall:
The cinder block wall’s footing or foundation serves as its foundation.
The foundation’s breadth must be more than twice as wide as the chosen cinder block.
Therefore, determine the wall’s width and then determine the footing area, the footing area’s dimensions are measured on the ground using a tape measure.
A foundation with a 9 m width and 6 m depth can support a wall that is 3 ft wide.
The footing needs to be wider the heavier and taller.
There must be no opportunity for water to seep into or collect in the constructed footing, so always design the foundation with good drainage in mind.
Consult the local building codes while designing and building a foundation.
4. Setting up and completing the initial row of the cinder wall:
Following the creation of the cinder block wall’s footing, the following procedures are carried out:
1. A coating of concrete is applied to the footing surface.
To help the first layer of cinder blocks stick to the concrete more effectively, add some roughness over it.
Until the first turn of the wall is achieved, begin laying the cinder blocks from one end of the wall in accordance with the stated arrangement.
2. Trace the brick’s edges along its whole length.
It is necessary to trace the cinder blocks’ four sides, the cinder block can now be removed and set aside.
3. Apply mortar with a trowel inside the lines you’ve drawn.
The 1 inch of mortar must be distributed throughout the surface.
4. Top the mortar layer with the first cinder block.
It is carefully pounded into the mortar mixture after being positioned upright atop the ready base.
5. The two flanges or protrusions on one end of the cinder block should be covered with mortar.
The flanges of the new block can then be joined with the flanges of the already-set cinder block.
6. Insert the fresh block into the base or older block.
The thickness of this mortar joint is up to 3/8 inches.
7. Repeat step 7 until the first layer of cinder blocks is finished.
8. Periodically wipe away any extra mortar that sticks out from the joints.
To prevent the mortar from hardening, do this after placing every few blocks.
9. Take a corner block or half cinder block once a straight wall is finished.
Mortar should be applied to the half-protrusions blocks and footing areas.
Put it directly on top of the base block and on top of the base block directly.
Place a whole block along the wall’s line once more, as described earlier.
In order to prevent in-line vertical joints, a corner block is placed at the beginning of the second layer.
10. Always use a level to verify the blocks’ level in relation to the foundation block every 10 minutes.
Always double-check the level in all directions.
11. A whole cinder block is used at the beginning of the third layer, a half block is used at the beginning of the fourth layer, and so on.
Up till the wall reaches the necessary strength, this procedure is continued.
12. To assist the bricks to become more solid, use a mallet or sledgehammer to tap the mortar joints.
Cinder Blocks in Various Shapes:
Standard grey cinder blocks:
This shape is strong and long-lasting, fireproof that has great soundproofing properties.
It is economical and energy-efficient, and complies with ASTM C-90 standards.
The common size, such as 8-inch x 8-inch x 16 inch, but the actual size is 7.625 inch × 7.6-inch x 15.6 inch.
Concrete Deck Block:
This is a basic and cost-effective form of deck construction.
The DIY consumer is the target market for this sort of block.
Dimensional lumber is accepted by deck blocks.
The footings of this block don’t require any mixing or pouring of concrete.
The standard size such as 7 inch but the actual size is 7.125-inch x 10.375-inch x 10.375 inch.
Cap concrete block:
This type of block is also known as a typical grey block.
Additionally, it offers exceptional soundproofing, fire resistance, and strength and longevity.
Common sizes include 4-inch x 8-inch x 16 inch; however, the actual measurements are 3.625 inch.
Standard cored Block:
Large structures including buildings, schools, and other establishments employ concrete walls made of cinder block.
Typical dimensions are 12″ x 8″ x 16″, although the actual measurements are 11.625″ x 7.625″ x 15.625″
Quikrete Concrete Deck Block:
This type of block is used to quickly and steadily construct structures and support decks.
The standard size is 10-inch x 10 inch but the actual size is 9.625 in. x 9.625 in.
Advantages of Cinder Blocks:
- A cinder block unit weighs very little compared to other building blocks since it has fewer aggregates and components.
- As compared to concrete blocks, cinder blocks are lighter.
Disadvantages of Cinder Blocks:
- Cinder block is not assumed to be a good alternative in all locations due to its low strength and high expense.
- Its applications are restricted by the bowing or buckling fixes it is susceptible to under heavy loads.
Also read: Hollow block | Cinder Block and Concrete Block | Glass Block
Conclusion:
An old and broad word for a type of structural block that is simply made out of numerous different materials is “cinder block.”
A concrete and cement combination are used to create cinder blocks in the field of civil engineering.

Related Posts
Refresh Your Office: Simple Ideas to Boost Productivity and Motivation in Your Workplace:
Understanding the Nuances of Office Chair Vs Ergonomic Chair to Select Better!
Rock Quality Designation(RQD): Building Strong Foundations
Spread Footing
Masonry Cement
Plain Cement Concrete
Concrete Efflorescence
Concrete Pile
Stepped Footing